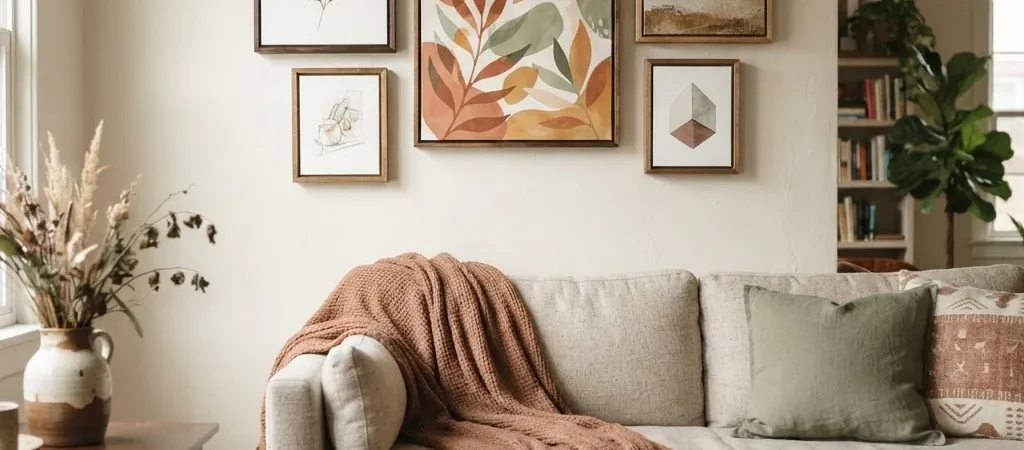
I have stood in front of more blank rental walls than I can count, holding a canvas print in one hand and feeling genuinely uncertain about where to begin. And I know I am not alone in that. A gallery wall sounds so approachable in theory, but once you are actually standing there with three or five canvases and a wall that you are not allowed to destroy, it can quickly feel like too much.
Here is the thing though: a canvas gallery wall is one of the most forgiving wall projects you can do. Canvas prints are lightweight, damage-free hanging is genuinely achievable for almost every size, and the planning process is easier than most blogs make it look. This guide walks through the whole thing, from figuring out your layout to putting the first piece on the wall, in the order that actually makes sense.
Before You Touch the Wall: Plan on the Floor First
Every gallery wall I have ever seen go wrong started the same way: someone skipped the floor planning step. They eyeballed the spacing, put up a nail, hung a piece, decided it was wrong, moved the nail, and repeated that until the wall looked like it had been through something.
The floor is your best friend here. Gather every canvas you are thinking of using, lay them out on the floor in the approximate shape you want, and look at the arrangement from a standing position. Walk around it. Swap pieces. Try the biggest one in a different spot. This costs you zero holes in the wall and can save you an hour of frustration.
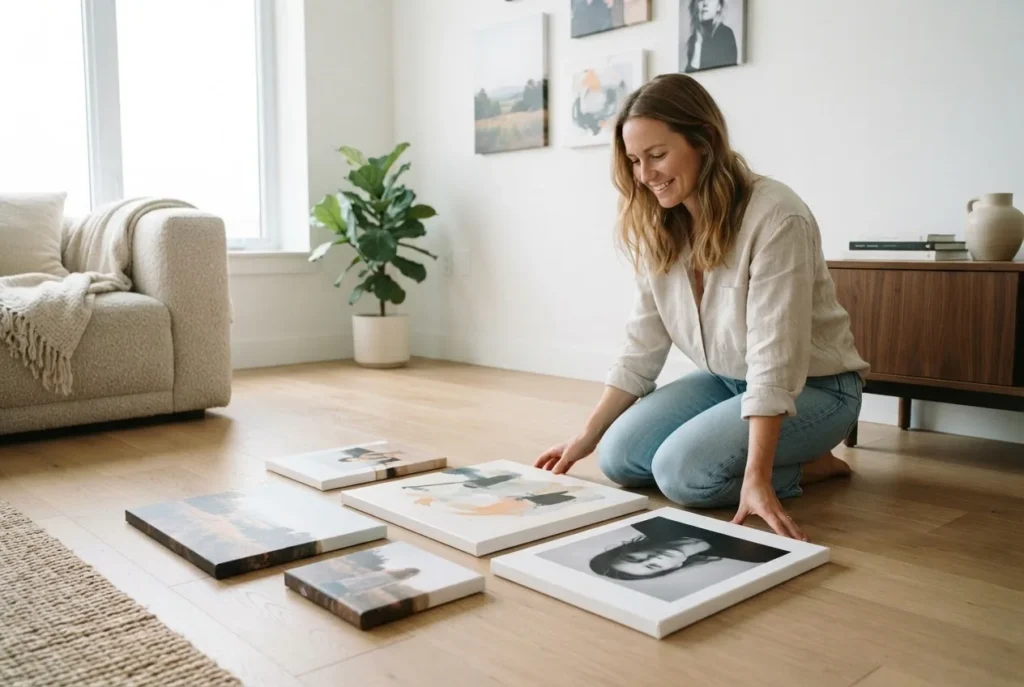
The goal during this stage is to find your anchor piece, which is usually the largest or most visually striking canvas in your collection. Everything else builds around it. Most designers suggest placing your second-largest piece diagonally from the anchor rather than directly beside it. That diagonal tension creates visual movement and keeps the eye traveling across the whole wall instead of stopping at one corner.
Once you have an arrangement you like, take a photo of it on the floor before you start moving things. You will thank yourself for this later when you forget which piece went where.
How Many Pieces Do You Actually Need?
You do not need a wall of twenty canvases to make an impact. In fact, some of the most striking canvas gallery walls are built from just three pieces, as long as they are sized and spaced with intention.
Here is a loose guide based on wall space:
A narrow wall or hallway (under 4 feet wide) works beautifully with a vertical stack of two or three canvases, all the same width, centered on the wall with 2 to 3 inches between them. It reads as one composed moment rather than a scattered collection.
A medium wall (roughly 4 to 6 feet wide, like the space above a sofa) tends to feel right with four to seven pieces. You have enough room for size variation and a little organic flow without it feeling crowded.
A large, open wall can support a bigger arrangement, but more pieces does not always mean better. Negative space around your arrangement is what makes the wall breathe. Resist the urge to fill every inch.
Sizing Your Canvases: What the Numbers Actually Mean
Standard canvas print sizes fall into a few clear ranges. Small canvases typically run from 8×10 inches up to 12×16 inches. Medium canvases cover roughly 16×20 to 18×24 inches. Large canvases start around 20×30 inches and go up to 24×36 inches. The wall art size guide from Nations Photo Lab is worth bookmarking: it covers the proportional relationship between art size and furniture width, which is one of the things beginners most often get wrong.
The proportion rule that matters most: your overall gallery wall arrangement should span about two-thirds to three-quarters the width of the furniture it hangs above.
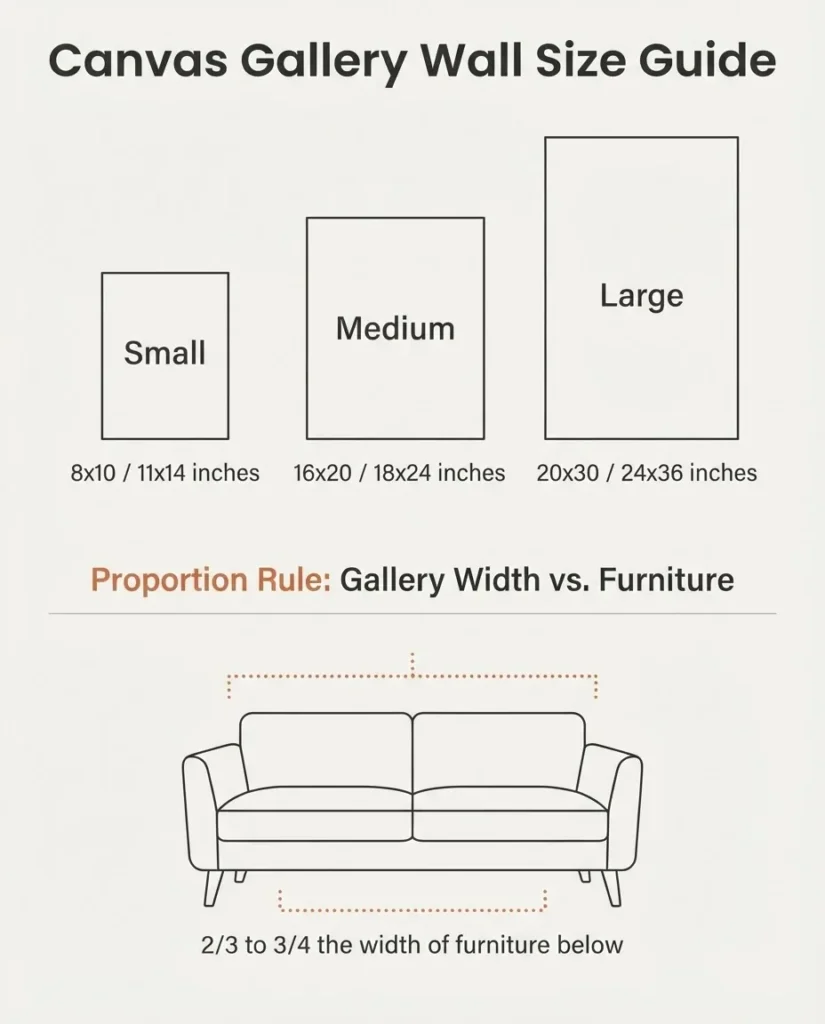
So if your sofa is 84 inches wide, your full canvas arrangement should fill somewhere between 56 and 63 inches. If you go wider than the furniture, the wall starts to look crowded and a little anxious. If you go narrower, the art looks lost and unanchored.
For a mixed canvas gallery wall, a reliable size combination that works in almost any room is: one larger anchor canvas (around 18×24 or 20×24 inches), two medium pieces (around 11×14 or 12×16 inches), and one or two smaller accent canvases (8×10 or 8×8 inches). This gives you size variation without chaos.
The Hanging Height Rule That Changes Everything
This is the single most common mistake in any gallery wall project, canvas or otherwise: hanging art too high. It feels instinctive to place things at eye level when you are holding them up to the wall, but eye level when you are reaching up is about a foot higher than where art should actually sit.
The standard used by galleries and museums is to hang the center of the artwork at 57 to 60 inches from the floor. That is roughly average adult eye level when standing relaxed, not reaching. Apartment Therapy has a clear breakdown of exactly how to use the 57-inch rule that I always send to friends who are tackling this for the first time. For a gallery wall, treat the entire arrangement as one single piece and center that grouping at 57 to 60 inches, not each individual canvas.
The math for hanging above furniture: leave 6 to 8 inches of clearance between the top of the sofa back or headboard and the bottom edge of the lowest canvas in your arrangement. Any less than 6 inches and it looks like the art is sitting on the furniture. Any more than about 10 inches and the wall grouping starts to feel disconnected from the room.
Spacing: The Detail That Makes or Breaks the Look
Spacing is where gallery walls either look intentional or look like someone just happened to put a bunch of things on the same wall. The Frameology frame spacing guide lays this out in practical terms: use 2 to 3 inches between medium-sized pieces as your baseline. For smaller canvases (under about 11 inches), you can tighten that to 1.5 to 2 inches so they read as a cluster. For larger pieces (18×24 and above), give them 3 to 4 inches so they have breathing room.
The rule that matters most is consistency. Pick one spacing measurement and use it throughout the whole arrangement.
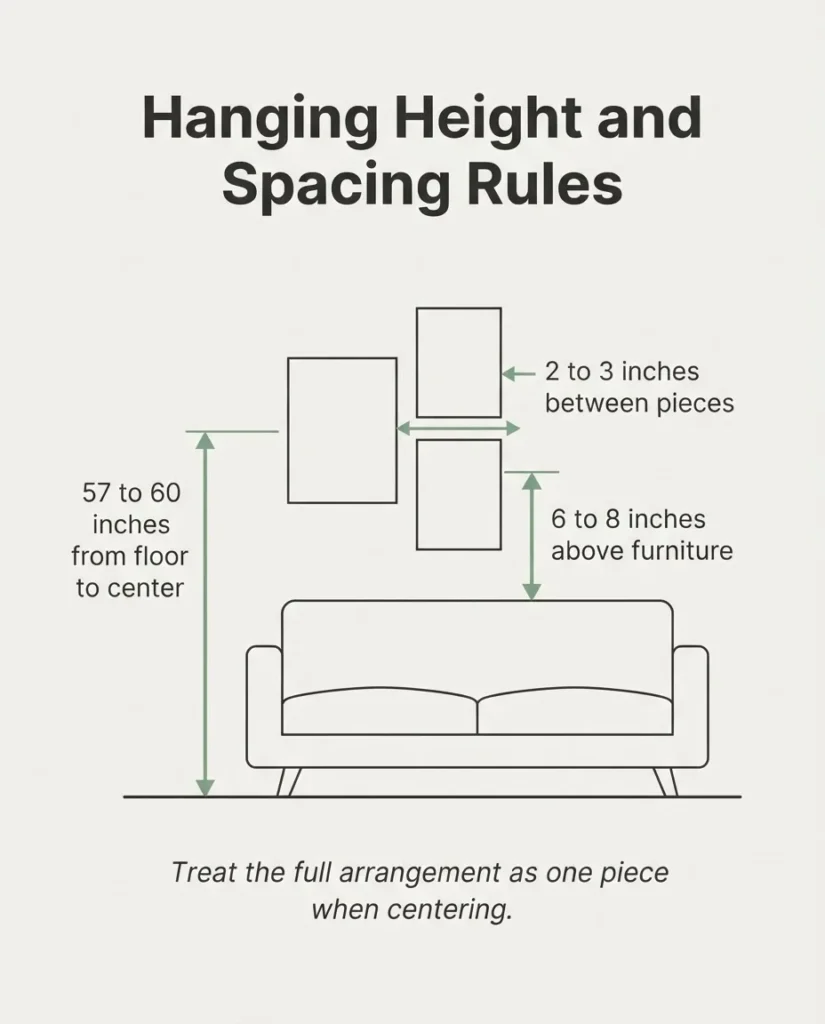
Even if you are mixing canvas sizes significantly, the gap between every pair of pieces should be the same. Consistent spacing is what transforms a bunch of art on a wall into a composed, intentional gallery.
One practical trick: cut a piece of cardboard to your target gap width and use it as a physical spacer while you mark your hanging spots. It sounds almost too simple, but it removes the guesswork entirely.
Making a Renter-Friendly Canvas Gallery Wall (No Nails Required)
This is where canvas has a genuine advantage over framed prints. Canvas prints, because they stretch over a wooden frame (the stretcher bar), are specifically designed to be hung from that inner frame rather than from a hook or wire. That design is what makes truly damage-free hanging possible for almost any canvas size you would realistically put in a gallery.
For canvases up to 18×24 inches, Command makes a Large Canvas Picture Hanger that holds up to 3 pounds and leaves zero holes or residue when removed. For larger canvases up to 24×36 inches, the Jumbo size handles up to 5 pounds. The official Command Canvas Picture Hanger product page shows exactly how the sawtooth ridge grips the stretcher bar, which is a different mechanism from their standard picture hanging strips and is worth understanding before you buy the wrong product.
A few things to know before you apply them. First, wipe the wall surface with a little rubbing alcohol and let it dry completely before sticking anything. Second, Command themselves advise waiting at least 7 days after painting before applying any of their adhesive products, and they specifically say not to apply them to wallpaper. Third, for your initial application, press each strip firmly against the wall for about 30 seconds and then wait at least an hour before hanging anything on it. Following these steps is the difference between a canvas that stays up and one that comes down at 2 a.m. Their full step-by-step application guide is worth a quick read before you start.
For canvases heavier than 5 pounds, which typically means very large gallery-wrapped canvases or thick-framed pieces, a small nail or a proper drywall anchor is the honest answer. If you are in a rental and cannot use nails, this is the point at which I would suggest either choosing a lighter canvas option or having a direct conversation with your landlord, since most will allow a single small nail for a specific piece.
How to Build a Cohesive Look When Your Canvases Don’t Match
This is the question I hear most often from people who have accumulated a few pieces over time and are not sure how to make them look intentional together. The canvases might be different styles, different sizes, and from different sources. That is actually fine. The trick is to introduce one or two unifying elements that tie the whole arrangement together visually.
The most reliable unifier for canvas specifically is the wrap color. When a canvas is printed and stretched, the fabric wraps around the edges of the wooden frame. That edge is visible in a gallery arrangement. If some of your canvases have black-wrapped edges, some have white, and some have the image continued around (called a gallery wrap), the wall will feel visually restless even if the art itself is beautiful. Choosing canvases where the edge treatment is consistent, or where you genuinely do not mind the variation, is worth thinking about before you order.
The second unifier is color temperature. Canvases that pull from a warm palette (ochres, terracottas, warm whites, deep greens) will generally feel cohesive even if the subjects are very different. The same is true for a cool palette (soft blues, grays, muted lavenders, warm off-whites). Where arrangements start to feel chaotic is when warm and cool tones compete with no connecting bridge.
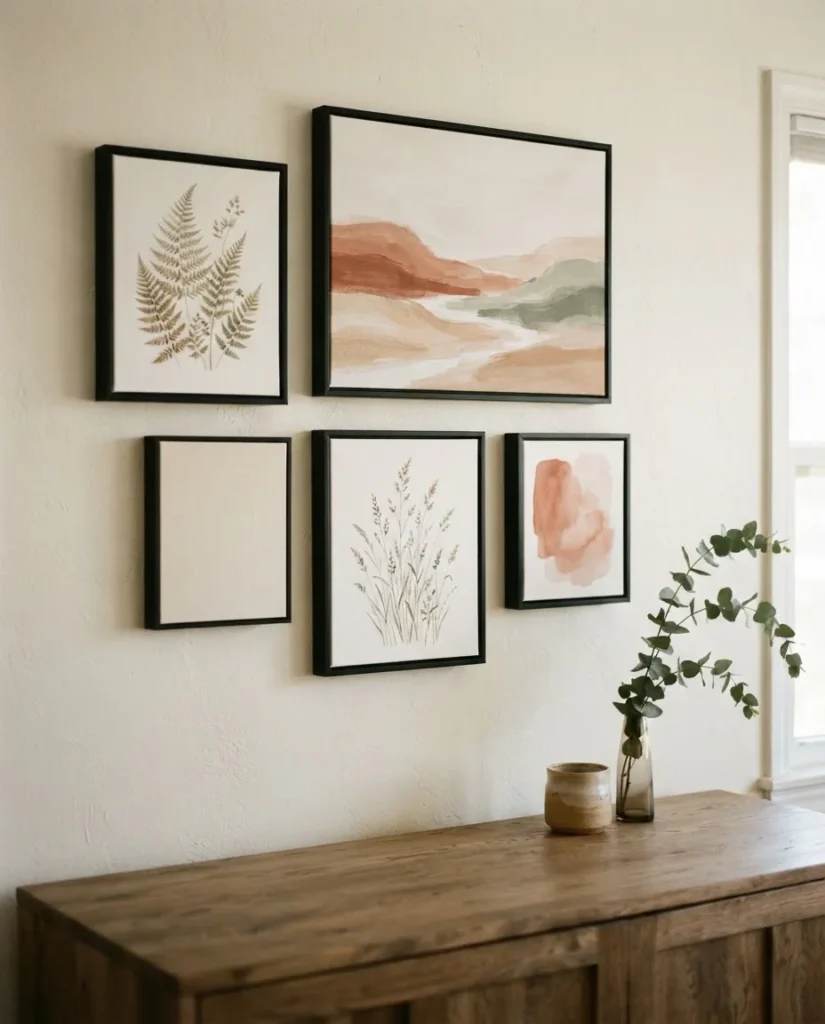
If you have canvases that span both, look for a piece with a neutral or earthy mid-tone to act as a visual bridge in the center of your arrangement.
A third option is to lean into tonal consistency rather than color matching. All muted and desaturated tones together feel calm and Nordic. All bold and saturated tones together feel energetic and eclectic. Mixing saturated and muted tones in the same gallery wall is where things tend to look accidental.
Layout Ideas by Room and Style
Canvas gallery walls work in more spaces than most people think to try them. Here is how I think about the approach by room.
In a living room, the wall above the sofa is the classic placement. An organic salon-style arrangement with a mix of canvas sizes and at least one larger anchor piece tends to feel the most personal and collected. If your style leans minimalist, a simple grid of four matching-size canvases in a 2×2 arrangement is clean and restful. If your style leans more boho or maximalist, an asymmetrical arrangement with varying sizes and tones feels lived-in and warm.
In a bedroom, the wall above the headboard is where I would start. A horizontal linear arrangement of two or three canvases, all at the same height, is calming and symmetrical. A single large canvas (20×24 or 20×30 inches) centered above the bed can be equally effective if you want something simple and anchoring.
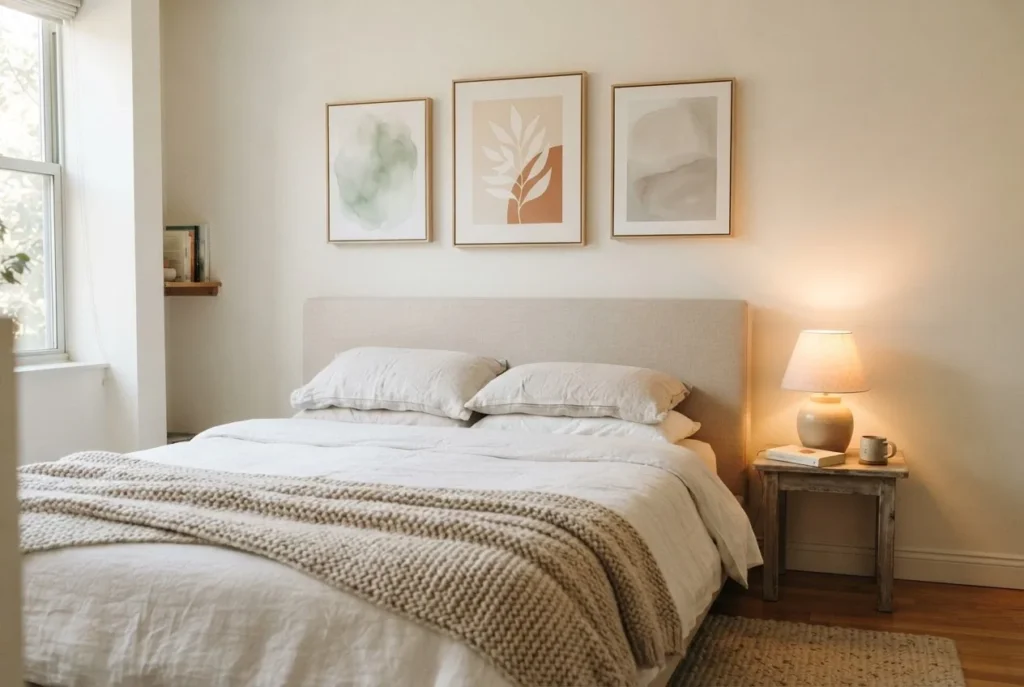
One thing to be aware of in the bedroom: Command explicitly advises against using their adhesive products over sleeping areas. If your headboard wall is also directly above where you sleep, a lightweight nail or anchor is the safer choice here.
In a hallway or entryway, a staircase arrangement (frames angled diagonally upward) is classic for a reason. It follows the eye naturally along the wall. A tighter horizontal row of three or four small to medium canvases at the same height also works well in narrow spaces where a staircase layout would feel too busy.
The Honest “Worth It / Skip It” on Canvas Prints
Canvas is not always the right choice, and I think it helps to be honest about that. Canvas prints look their best when the photograph or artwork has contrast, texture, and color depth, things that show up beautifully on fabric with a slight texture. A rich landscape, an abstract with texture, a botanical illustration, a portrait with warm lighting: all of these translate beautifully to canvas. A very flat graphic or a simple text print can look a little underwhelming on canvas because the texture of the fabric competes with the simplicity of the image.
For an all-canvas gallery wall to look genuinely elevated rather than like a photo package from a department store, the images themselves need variety in subject and tone, the sizing needs to have clear hierarchy (anchor piece, secondary pieces, accent pieces), and the spacing needs to be deliberate and consistent.
If you are on a budget, the best place to spend is on the two or three largest, most prominent canvases in the arrangement. You can save on smaller accent canvases because they are read from a distance and the detail matters less. Ordering custom prints for a meaningful photo or a piece of art you love is almost always worth it. Ordering a matching set of generic canvas prints from a discount site just to fill space usually ends up looking like exactly that.
Common Gallery Wall Mistakes (And How to Fix Them Before You Start)
Apartment Therapy put together a practical rundown of common gallery wall mistakes that is worth reading alongside this guide. From my own experience, the mistakes I see most often with canvas gallery walls specifically are:
Hanging too high. As covered above, the center of your arrangement wants to be at 57 to 60 inches, not at the top of the wall. When canvas arrangements sit too high, they feel disconnected from the room and make the ceiling feel lower, not higher.
Scale that is too uniform. A gallery wall of all identically-sized canvases tends to look like a product display rather than a curated collection. Even if you prefer a grid layout, introducing at least one canvas that is clearly larger or smaller than the others adds visual interest.
Spacing that is inconsistent. Even a small difference in gap width between pieces reads as a mistake to the eye. Measure and use a physical spacer. It takes five extra minutes and makes a real difference.
Skipping the floor layout step. This is the one that causes the most unnecessary holes and frustration. Lay everything out first. Take a photo. Then hang.
A Few Final Thoughts Before You Start
A canvas gallery wall does not need to be finished all at once. It is one of those projects where you can start with two or three pieces and add a fourth or fifth piece over time as you find things you love. In fact, walls that have been built up gradually often feel the most personal and the most like home.
You also do not need to spend a lot of money to start. A smaller arrangement of three well-chosen canvases in sizes that relate to each other, hung at the right height with consistent spacing, will almost always look better than a wall packed with mediocre pieces. Edit first. Add slowly. Give the wall some room to breathe.
That blank wall has been waiting for something. It does not have to wait much longer.