
The short answer is this: most frames tilt because the hanging system lets them. A single wire draped over a single nail gives the frame one pivot point and nothing else. Gravity and vibration do the rest. The fix, in most cases, is either adding friction at the bottom corners or switching to a two-point hanging setup. Neither one is complicated, and most of the solutions cost just a few dollars.
Here’s the longer version, because if you know exactly why your frame is tilting, you can pick the right fix the first time instead of trying three things that don’t work.
Why Frames Tilt: The Three Root Causes
Before buying anything or putting more holes in the wall, it helps to figure out which version of this problem you’re actually dealing with. There are three main reasons a frame keeps going crooked, and they have different fixes.
Rotational freedom. This is the most common one. When a frame is hung on a single nail with a wire stretched across the back, the wire rests at one contact point on that nail. The frame can rotate left or right around that single point with almost no resistance. The Picture Hang Solutions guide on fixing crooked frames explains this clearly: the frame is essentially free to pivot because there is nothing stopping it from doing so. A door closes down the hall, someone walks past, the HVAC kicks on, and the frame shifts a millimeter.
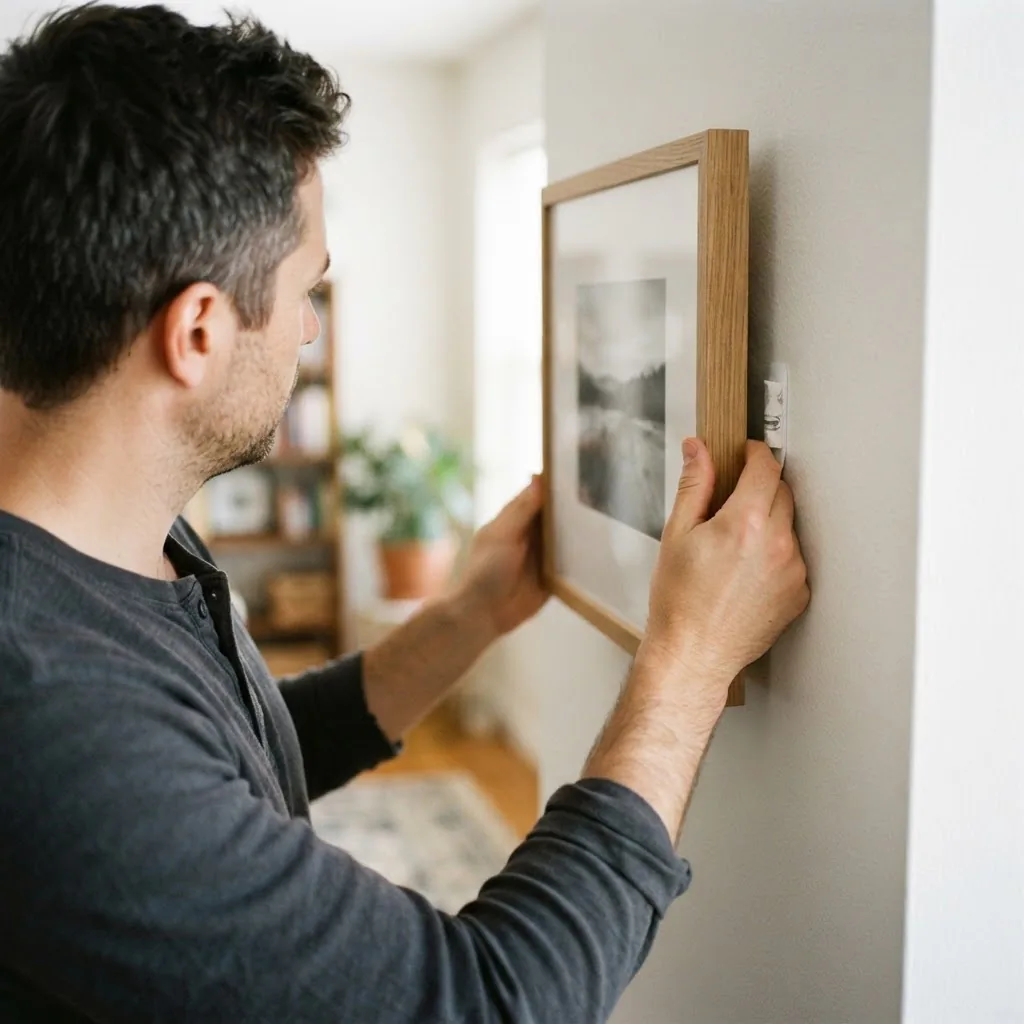
A millimeter at the top becomes a visibly crooked frame at the bottom.
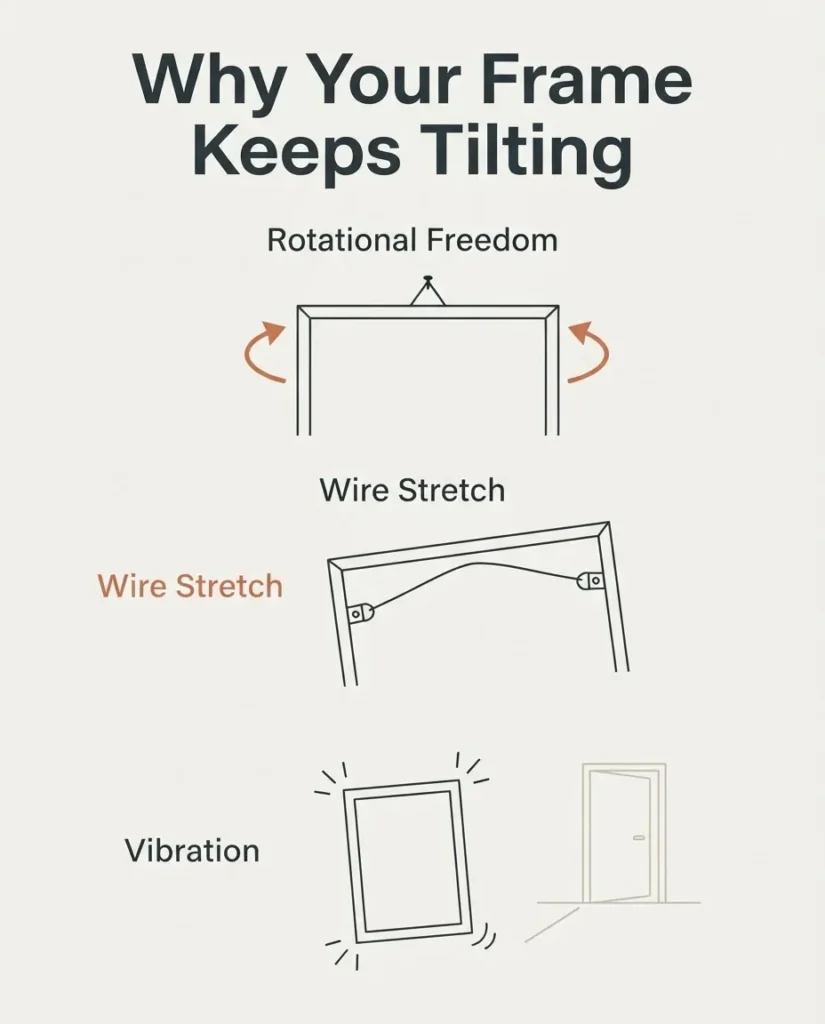
Wire stretch over time. Even quality picture wire is a tension system. When weight hangs from it continuously, the wire micro-elongates under load. If one side of the wire is slightly longer than the other, or stretches unevenly, the frame slowly tips toward the heavier or longer-wire side. This kind of tilt often sneaks up on you. The frame looks fine for weeks, then one day it’s noticeably off and you’re not sure when it happened. Humidity cycling can make this worse, because it affects both the wire and the frame material itself, causing subtle dimensional changes that shift the balance.
Vibration. Halls, stairwells, and rooms near street traffic are especially prone to this. Every time a door slams, someone walks by, or the dryer runs, the frame gets a micro-nudge. On smooth drywall, those nudges are small but consistent. On textured walls like knockdown or orange-peel finishes, it’s actually worse, because the frame’s backing has less even contact with the wall surface, leaving more room for the bottom of the frame to shift.
Most of the time you’re dealing with a combination of all three, but knowing the primary culprit points you straight to the right fix.
Start Here: Check What Hardware Is on the Back of Your Frame
The hanging hardware on your frame’s back matters more than most people realize. Understanding the difference shapes which fixes will actually work for your situation.
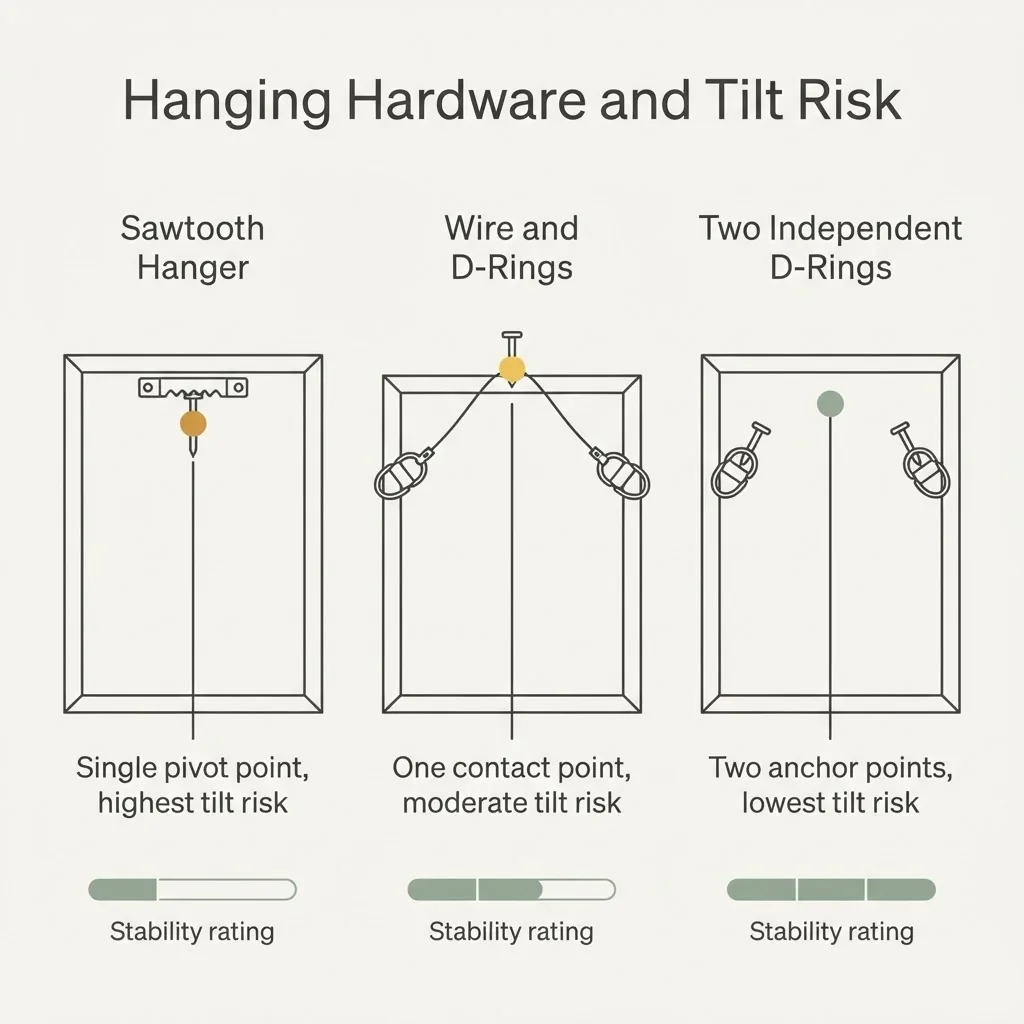
A sawtooth hanger is the metal strip with jagged teeth screwed or pressed across the center of the frame’s top edge. It’s simple and fast, but it rests on a single central nail and acts almost like a rocking point. Any lateral push from vibration or a passing hand can send it left or right. Sawtooth works fine for small, lightweight frames in low-traffic spots. For anything larger, or in a busy hallway, it’s the least stable option.
A single wire draped across two D-rings is the most common setup on mid-size and larger frames. The problem is still single-point contact at the nail, which means rotational freedom. If the wire is unevenly tensioned from the D-rings, one side pulls tighter than the other and the tilt starts immediately.
Two independent D-rings mounted at the same height, each hung on its own nail or hook without any wire connecting them, is a much more stable system. For the frame to tilt, it would have to overcome resistance at both hanging points simultaneously. That essentially eliminates the typical real-world drift. This is the setup to move toward for anything you really want to stay put. For a deeper look at how these hardware types compare for stability, Picture Hang Solutions has a solid hardware guide that breaks down each type in plain terms.
The Fixes, from Cheapest to Most Involved
Here is where most people want to start. I’d suggest reading the root cause section first so you know which fix to reach for, but I also understand that sometimes you just want to know what to buy.
Fix 1: Adhesive rubber bumper pads on the bottom corners.
This is the starting point for almost everyone. Peel-and-stick rubber bumper pads go on the back of the frame at the two bottom corners. They add friction between the frame and the wall, which directly resists the bottom of the frame from drifting sideways. They also protect your paint from the frame’s back edge. On smooth drywall, they work remarkably well. They’re invisible from the front, they don’t require any new holes, and they’re completely removable. If you’re a renter, this should be your first move.
They do work better on smooth drywall than on heavily textured walls. On deep orange-peel or knockdown finishes, the bumpers have less surface contact with the wall, so they’re somewhat less effective. They still help, but you may need to combine them with museum wax for textured surfaces.

- 164PCS VALUE PACK: Sheet of 164PCS commonly used clear bumpers,100PCS Hemispherical(10mm/0.4″ in diameter and 3mm/0.12″ …
- SELF ADHESIVE: Premium strong adhesive backing makes the bumpers stick well and not fall off.
- SOUND DAMPENING & CUSHIONING: These sound dampening bumpers provide ample cushioning keep the cabinet doors drawers from…
Fix 2: Museum wax or museum gel on the bottom corners.
Museum wax has been used in actual museums for decades to keep objects from shifting or falling during seismic activity. For picture frames, a small pea-sized dab pressed into each of the two bottom corners creates a gentle but real grip between the frame and the wall. It’s removable, it’s non-damaging, it doesn’t leave marks or residue, and it can be reused. For renters who are especially cautious about wall damage, this is a reassuring option because it doesn’t puncture or press into the wall surface at all.
The most widely used product in this category is Quakehold Museum Wax. Buyers consistently report it as effective for keeping frames, decor trays, and small objects from shifting, and the non-toxic, clear formula is easy to apply and easy to remove when you need to rehang or move things. Apply a small amount to the bottom corners of the back of the frame, position the frame exactly where you want it, then press firmly so the wax makes contact with the wall.

- CRYSTALLINE CLEAR MUSEUM WAX: A 13 oz. anchoring wax for collectibles and artifacts that helps reduce falling and breaki…
Fix 3: AnchorPoints, the dedicated anti-tilt stabilizer.
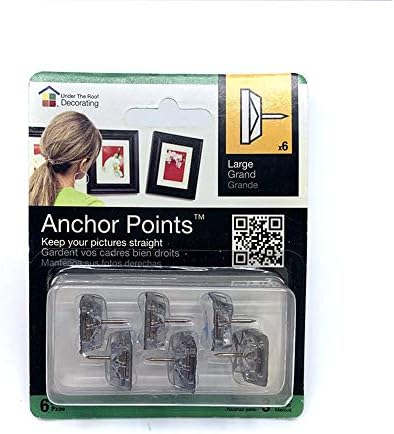
AnchorPoints are a purpose-built product from Under the Roof Decorating designed specifically for this problem. They’re small adhesive-backed pieces with a pin on the face. You attach one to each of the two bottom corners of the frame, with the pins pointing toward the wall. Once your frame is hung and perfectly level, you press the bottom of the frame firmly into the wall so the pins seat into the drywall. The frame is now locked at three points: the hanging hardware at the top and two AnchorPoints at the bottom. To tilt, it would have to pull both bottom pins free simultaneously, which essentially doesn’t happen.
The official AnchorPoints product page is worth reading for one critical note: AnchorPoints are a stabilizer, not a hanging system. Never use them as the primary way to hang a frame. They go on after the frame is already correctly hung. They work on smooth drywall and lightly textured surfaces. According to the manufacturer’s product page at UTR Decorating, you always use two per frame, one in each bottom corner, and never one centered on the bottom edge, because a single center point allows the frame to rock from side to side and will come loose and potentially damage the wall.
- Stops your pictures from moving on the wall
- Hang you picture using standard hanging hardware; Stick the AnchorPoints to the bottom two corners of the frame; Push th…
- Your frames will never move again, even in high traffic areas or when dusting
Fix 4: Switch to a two-point hanging system.
If your frame has a wire running between two D-rings on the back, and it keeps tilting no matter what you do to the bottom corners, the real fix is to change the hanging method. Remove the wire, hang each D-ring independently on its own picture hook or nail, and set those two nails level with each other. This eliminates rotational freedom entirely, because both sides of the frame are now anchored independently. The frame cannot rotate left or right without overcoming resistance at two separate points.
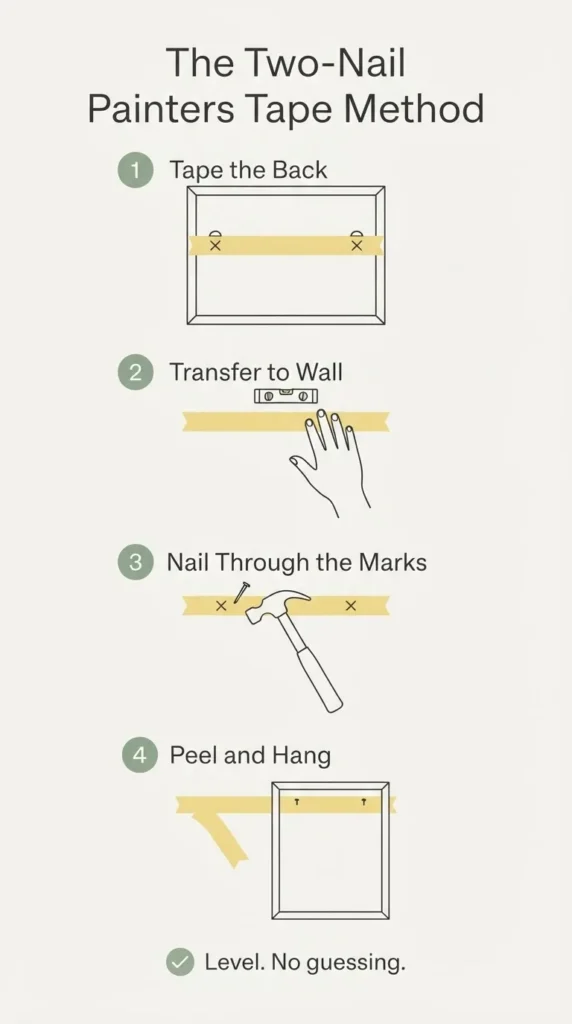
The challenge is getting two nails level with each other. The painters-tape method is the most reliable low-skill approach. Put a strip of painter’s tape across the back of the frame, spanning both D-rings. Mark the exact center of each D-ring on the tape. Then transfer that tape to the wall where you want the frame hung, use a level to confirm the tape is straight, and nail through the marks. Pull the tape off and hang the frame. Each nail now sits exactly where each D-ring expects it. Clean, accurate, and no specialized tools required.
For Renters: No-Hole and Removable Options
If you’re renting and your lease restricts wall holes, or you’re just not comfortable putting more holes in the drywall, two paths make sense.
Command Picture Hanging Strips are the most well-known adhesive hanging option. They use an interlocking adhesive foam strip that bonds the frame directly to the wall, with no nail needed. For the frame-tilting problem specifically, Command strips are actually a very good solution because the strip runs along the top edge of the frame and the frame is fully adhered to the wall, not hanging from a single pivot point. There is essentially no rotational freedom when a frame is flush-adhered with strips. The key is staying within the weight limits, which 3M publishes clearly on their official Command weight limits page: Medium strips handle up to 10 lbs with a maximum frame size of 18″ x 24″; Large strips handle up to 16 lbs with a maximum frame size of 24″ x 36″. Follow the application instructions exactly, including the 24-hour wait time before hanging anything, because that’s where most people run into problems with Command strips failing.
For heavier frames or frames your landlord has already told you to stop putting extra holes in the wall for, Command strips won’t be the answer. That’s when you’re looking at a conversation with the landlord about proper picture hooks, or at a creative furniture solution like a leaning ledge shelf, which I cover separately.
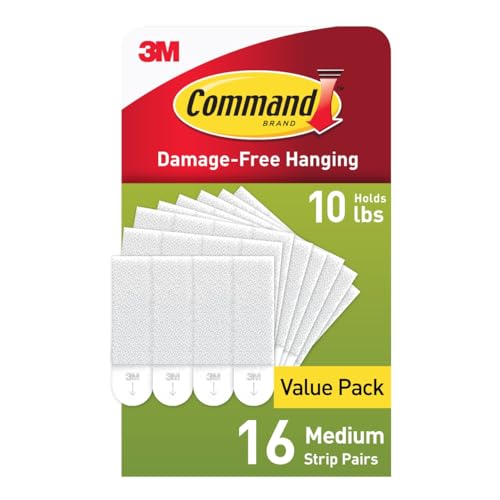
- DAMAGE-FREE PICTURE HANGERS: Includes 16 pairs (32 strips) of White Command Medium (10lb) Picture Hanging Strips, unique…
- WORKS ON A VARIETY OF SMOOTH SURFACES: Wall hanging strips work on a variety of smooth surfaces, including painted walls…
- SURFACE PREP: Clean the desired surface with rubbing alcohol to remove grime and dust to allow the no damage wall hanger…
Getting Level Before the Frame Goes Up
None of the anti-tilt fixes above work as well if the frame wasn’t level to begin with. A frame that’s hanging crooked because it was hung crooked needs to be re-hung correctly first. The bumpers and museum wax will then hold it there.
For hanging a single frame, a basic bubble level is all you need. For hanging a gallery wall or a series of frames at matching heights across a wider span, a laser level makes the job dramatically easier and takes the guesswork out of spacing. The PREXISO Multi Surface Laser Level is a compact, beginner-friendly option that mounts to the wall with two small pins or adhesive pads, projects both a horizontal and vertical line up to 30 feet, and includes the batteries. For anyone putting up a multi-frame gallery wall and wanting every frame to sit at the same height without measuring and re-measuring, this kind of tool pays for itself in time and re-dos prevented.

- NOTE: This product is not a stud finder or a magnetic nail finder
- One-switch Operation: Simple one-switch operation powers 3 laser lines on and off, projecting 3 level line onto surface;…
- Angle Dial & LED light: The angle dial is used for angle reference, easily change the angle you want within the range of…
Textured Walls: What Changes
If your walls have a textured finish, specifically knockdown, orange peel, or anything that isn’t completely smooth, the tilt problem is more stubborn and the fixes need a slight adjustment.
On textured drywall, bumper pads make contact with just the peaks of the texture rather than a flat surface, so their grip is reduced. Museum wax fills the gaps better and tends to work more reliably on lightly textured surfaces. AnchorPoints still work on textured walls because the pins seat into the drywall material itself rather than relying on surface friction. For heavily textured walls, combining AnchorPoints or museum wax with the two-point hanging system gives you the most stable result.
Command strips, by contrast, specify smooth wall surfaces in their application instructions. On heavily textured walls, the adhesive doesn’t bond as reliably, and the strip is more likely to fail. If your walls are heavily textured and you need a no-hole option, a leaning art ledge shelf is probably a better long-term solution than fighting with adhesive on that surface.
For a broader overview of the approaches buyers and renters use to keep frames straight across different wall types, the UTR Decorating guide on keeping picture frames straight on a wall is a useful quick reference.
When to Upgrade the Hanging Hardware Entirely
Most frames tilt because of how they’re hung, not because the wall or frame itself is defective. But there are cases where the right call is to change the hardware on the back of the frame.
If you have a heavy frame (generally over 10 to 15 lbs) hung on a single nail with a wire, and the wire keeps shifting no matter how many bumpers you add, you have a structural problem that surface-level fixes won’t solve. At this point, consider switching to two independent D-rings with two hooks, or using a French cleat mount for anything really heavy. A French cleat is a pair of interlocking beveled strips, one screwed to the wall and one to the frame, that distribute weight across a wide span and give you essentially zero tilt risk. It’s overkill for a standard 8×10 family photo, but for a large, heavy mirror or a substantial canvas, it’s the right answer.
For a complete reference on hardware choices by weight and frame type, the Frame Destination guide on keeping picture frames straight covers the options well, including when a wire system stops being appropriate.
Quick Decision Guide: Which Fix Is Right for You?
| Situation | Best Fix |
| Lightweight frame, smooth drywall | Adhesive rubber bumper pads |
| Renter, no extra holes allowed | Command picture hanging strips |
| High-traffic hall, kids or pets nearby | AnchorPoints or museum wax |
| Textured wall, frame keeps drifting | Museum wax or AnchorPoints (pins seat into texture) |
| Two-nail frame that keeps rotating | Two-point D-ring system + bumper pads |
| Heavy frame, wire-based system | French cleat or two independent D-rings |
| Hanging multiple frames at one height | Laser level before anything else |
FAQ: How to Keep Frames Straight
Why does my picture frame keep tilting even after I straighten it?
A frame that keeps tilting has a hanging system that allows rotational movement. In most cases, it’s hung on a single nail with a wire, and that single contact point lets the frame pivot freely. Adding adhesive bumper pads to the bottom corners or switching to a two-point hanging system (two nails, two D-rings) eliminates that pivot and stops the drift.
Do rubber bumper pads actually work for keeping frames straight?
Yes, for smooth drywall and lightly textured walls. Adhesive rubber bumper pads placed on the back bottom corners of a frame create friction against the wall that resists tilting. They cost a few dollars, leave no marks, and work on smooth and lightly textured walls. On heavily textured surfaces, museum wax or AnchorPoints work more reliably.
What is the difference between museum wax and AnchorPoints for frames?
Museum wax is a soft, removable gel that creates a grip between the frame’s bottom corners and the wall using adhesion. AnchorPoints are small physical pins that seat into the drywall, locking the bottom corners mechanically. Both work as anti-tilt stabilizers and both require the frame to already be hung. AnchorPoints give a firmer lock, especially in high-traffic areas. Museum wax is gentler, leaves zero marks, and is easier to apply and remove.
Can I use Command strips to stop a frame from tilting?
Yes, and this is actually one of the better no-hole options for renters. Command picture hanging strips adhere the frame directly to the wall across the top edge, which eliminates the pivot point entirely. Stay within the weight limits printed on the packaging and follow the application instructions, especially the 24-hour cure time before hanging. Medium strips support frames up to 10 lbs and 18″ x 24″. Large strips go up to 16 lbs and 24″ x 36″.
Is a sawtooth hanger or a wire hanger more likely to tilt?
Both can tilt, but sawtooth hangers are generally less stable because they rest on a single center point on one nail. A wire-and-two-D-ring system at least spreads the load, but still has rotational freedom at the nail. The most stable basic setup is two independent D-rings, each hung on its own nail, with no wire connecting them. This gives the frame two separate anchor points and nearly eliminates tilting from normal household vibration.